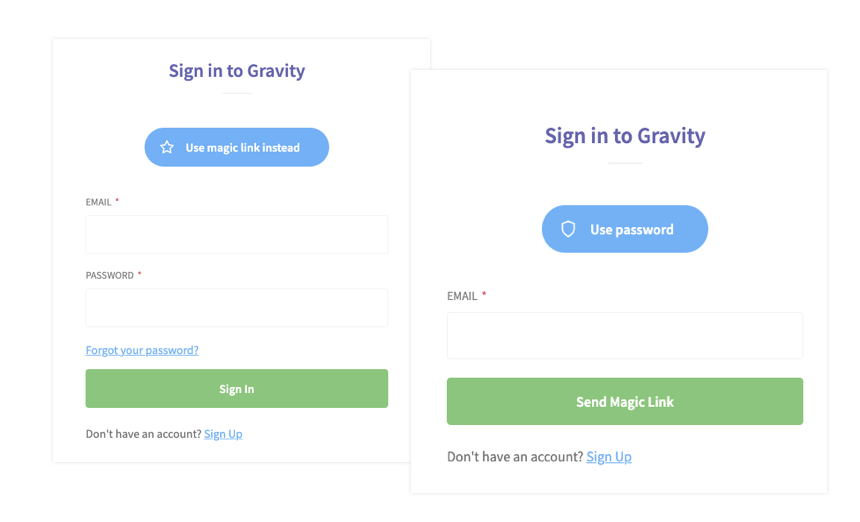
Magic sign-in links are not only cool, they tend to be more secure than using passwords and are even easier to implement than password-based authentication.
Adding password-less authentication to your Node.js web application is a hot trend at the moment after Slack popularised this method. It may sound like voodoo to some, but adding password-less entry to your application is very easy.
How A Magic Password-less Link Works
- User visits your web application and requests a magic link.
- The application sends an email containing a link and JWT token that expires in 5 minutes.
- The user receives the email and clicks the link.
- If the token is valid, the user is signed in otherwise they're directed to try again.
JWT Security Precautions
While magic links are generally more secure than a username and password combination, there are some precautions you must consider:
- The JWT should expire in 2-5 minutes. You want to create a small window for the magic link to work and never use a token that never expires.
- As per standard JWT secure practices, you should never store sensitive information like the user's password in the JWT.
Check out the previous article for more Node.js security tips.
Now, let's write some code!
1. Request a Token
I'd recommend providing users with two options to sign in - either with a username and password combination or with a magic link.
In the Gravity SaaS boilerplate, there is a sign in form that can be toggled between user/password or magic link. The form will be sent to one of two different endpoints depending on which option the user selects.

If using a standard email/password combo the form is sent to /api/user/auth
Otherwise, the magic endpoint /api/user/auth/magic is used instead.
Design the form however you like, and let's dive under the hood and look at the code.
2. Generate the Token
When the user submits the form and requests a token from the /api/user/auth/magic endpoint, a new JWT is generated and emailed to the user.
exports.magic = async function(req, res){

  const userData = await user.get(null, req.body.email);

  if (userData){

    // generate a token that expires in 5 mins
    const token = await auth.token({ id: userData.id }, null, 300);

    // send email
    await mail.send({
      to: userData.email,
      template: 'magic_signin',
      content: {

        token: token

      }
    });
  }

  // always return a positive response to avoid hinting if user exists
  return res.status(200).send();

}
In the code above, we first check if a user is registered with the email address they provided in the sign-in form.
If the user exists, a JWT containing the user ID is created and set to expire in 300 seconds (5 minutes).
An email is then sent to the user with a link that looks like this:
https://usegravity.app/magic?token=JWTNote: If the user doesn't exist, it's a good idea to still send a 200 response to avoid hinting to an attacker that this email address is registered.
2. User Clicks the Link
The user will receive an email containing the JWT link. It is good practice to provide some security advice in the email to help users avoid falling victim to a phishing scam.
When the user clicks the link, they'll be directed to a view in your application that verifies the token. So set up a new route called /magic.
export function MagicSignin(props){

  const qs = props.location.search;
  const context = useContext(AuthContext);
  const [message, setMessage] = useState({

    type: 'success',
    title: 'Using The Magic',
    text: 'Signing you in now...',

  });

  useEffect(() => {
    const verifyToken = async (token) => {
      try {

        const res = await Axios.post('/api/user/auth/magic/verify', { token: token });

        res.status === 200 ? context.signin(res) :
          invalidLink();

      }
      catch (err){

        invalidLink();

      }
    }

    if (qs.includes('?token=')){

      // check token exists
      verifyToken(qs.substring(qs.indexOf('?token=')+7));

    }
    else {

      invalidLink();

    }
  }, [qs, context]);

  function invalidLink(){
    setMessage({

      type: 'error',
      title: 'Magic Link is invalid',
      text: 'Please generate a new link and try again',
      buttonLink: '/signin',
      buttonText: 'Back to Sign In'

    });
  }

  return (
    <Animate>
      <Row>

        <Message
          type={ message.type }
          title={ message.title }
          text={ message.text }
          buttonText={ message.buttonText }
          buttonLink={ message.buttonLink }
         />

      </Row>
    </Animate>
   )
}
In this code block, first extract the query string that contains the token then create a state object called message that will provide feedback to the user.
When the view loads, if the token exists in the query string, then verifyToken() is called.
This function sends the token to the verification endpoint at /api/user/auth/magic/verify
If a 200 status is received, the user is authenticated, otherwise, invalidLink() is called which renders a message prompting the user to try again.
3. Verifying the JWT
The final step is to authenticate the user on the server, using the token and return a response to the client.
exports.magic.verify = async function(req, res){

  const magicToken = auth.token.verify(req.body.token);

  // check user exists
  const userData = await user.get(magicToken.id);

  // authenticated
  if (userData){

    const token = await auth.token({ accountId: userData.account_id, userId: userData.id, permission: userData.permission });

    return res.status(200).send({

      token: token,
      permission: userData.permission,
      name: userData.name,

    });
  }

  // error
  return res.status(401).send();

}
First, verify and extract the token, then use the user ID within it to check if the user exists.
If the user does exist, then a new JWT is generated, this time with an authentication token and permission level (and whatever else your application needs). This token is sent to the client and stored in localStorage and will be used to authenticate future API calls.
If the user doesn't exist, a 401 unauthorised status is returned to the client, which will invoke the invalidToken() function in the previous step.
That's an App Folks
Was this tutorial useful? If you have any questions please @reply or DM me on Twitter and I'll do my best to help you
PS. I'm working on an automated web app testing tool called Firelab. Get exclusive access to the beta here.

